


Simple Science Experiments: Sound and Waves
What causes sound to happen? What makes sound have different pitches or notes? We’ll be tackling these this month in Simple Science. There are several things to try this time, so follow the procedure you wish!
Materials for everything:
Styrofoam cups, rulers, rubber bands, string, metal cans, nail, hammer, paper, pencils, various objects like small boxes, cups, etc. (see procedure).
Experiment 1: What is Frequency?
Specific Materials:
Ruler, paper, pencils
Procedure part 1:
1. Hold a ruler over the edge of a table. First start with most of the ruler hanging over
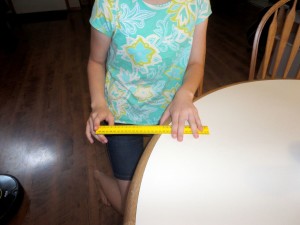 2. Gently strike the ruler so that it vibrates up and down. Note the relationship between how fast it moves and the sound this makes!
3. Bring the ruler more onto the table and strike it again. Once more, note the speed of vibrating and the sound
4. Start the ruler way off the edge. Hit it, and as it is vibrating, quickly pull it onto the table to hear the sound change
Explanation: Frequency is defined as how many times something happens per second. You should notice that with more of the ruler off the edge it doesn’t vibrate a lot. That means it has a low frequency. It also has a lower sound than when you have less of the ruler on the table. So the important thing here is: low frequency makes a low sound, and high frequency makes a high sound!
Procedure part 2:
1. Two people make this part work better than one! One person slowly moves a pencil back and forth along the edge of a long strip of paper. 2. The other person pulls the paper at a steady rate underneath the drawing so a back and forth motion is drawn
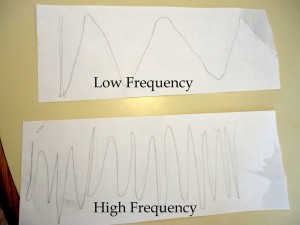
3. Get another strip of paper and repeat the process but the drawer this time moves the pencil faster. Still pull the paper out at a steady rate!
Explanation: This shows how frequency can actually be measured. The low frequency is the one with the fewer waves on it. Upper level science will have you figure out wavelength and wave speed with this information! If you have questions or want to know more, email the author. (address below)
Experiment 2: Rubber Band Guitar
Specific materials:
Rubber bands (thick and thin, big and small!), boxes, cans, and pretty much anything you might want to stretch the rubber band over!
Procedure:
1. Stretch a rubber band over your thumb and forefinger and strum it with your other hand. Listen to the sound! Think about the frequency at which it vibrates and relate it to the ruler experiment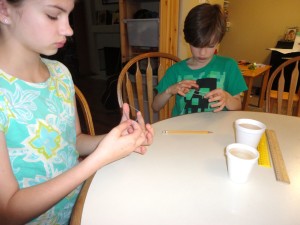 2. Stretch the rubber band further and strum it again
3. Want to make the sounds louder? Think of how a guitar does this and find something to stretch the rubber band over (try a small box or a metal can)
4. Why does this make it louder?
Explanation: Once again, the faster something vibrates (higher frequency), the higher the note it makes. To amplify the sound, you need to have the rubber band also vibrate something else, like a small box. An acoustic guitar has a nice wooden body that vibrates as the strings are strummed and makes it louder. Can you make a guitar with different rubber band strings to make different sounds?
Experiment 3: Tin Can Telephone
Specific Materials:
Two empty food cans with one end taken off each can, about 10 foot length of string, a hammer and nail
Procedure:
1. Have an adult use the hammer and nail to put a big enough hole in the ends of the metal cans. Be sure the other ends don’t have any sharp metal sticking out!
2. Put the string through the holes and tie a knot in each end. 3. Have two people pull the phone tight and have one hold a can to their lips and the other hold it to their ear.
4. Speak though it! Loudly, softly, with the other ear plugged… experiment with sound!
Explanation: Remember, sound is a bunch of vibrations! As you speak into the can, the vibrations then make the string vibrate and travel to the other end where the other can acts as an amplifier.
Experiment further:
Now that you know the basics of sound, you can take these principles and experiment all you want. Can you try to make a bigger guitar? Will the phone work better with thick or thin string? What material makes the best amplifier for your rubber band strumming? Good luck!